
When you start Dreamweaver, you need to tell the computer where your work folder is, and where your server is so that you can upload versions of your website and see what they look like on the internet.
Think logically about what the Dreamweaver program needs to know if you want to upload a website.
On your computer all you need is
On the remote server you will need the following information
We know what information we need. The way you configure this information in to Dreamweaver is to configure a "Site". It's pretty easy.
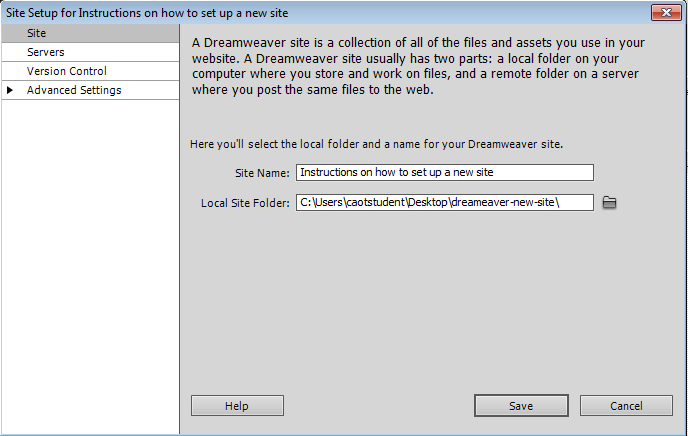
Start up the Dreamweaver program. From the "Site" menu select "New Site" as shown in the following diagram.
Fill in the form with the name and location of the site you want to work on.
Now click on "Server" at the left side and locate the "+" button.
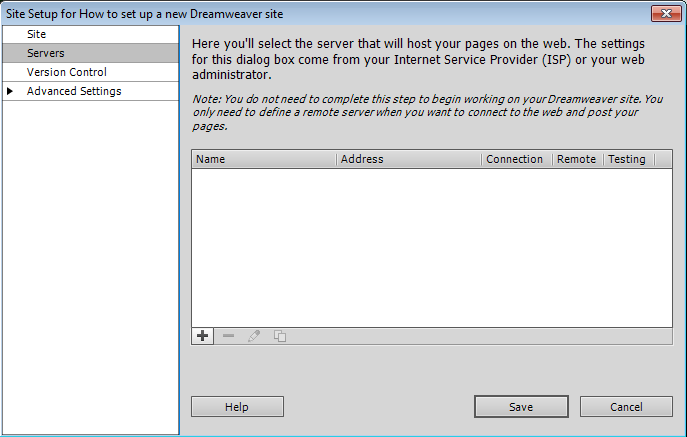
Click the "+" button to enter the information for your site similar to what I have done for my site below.
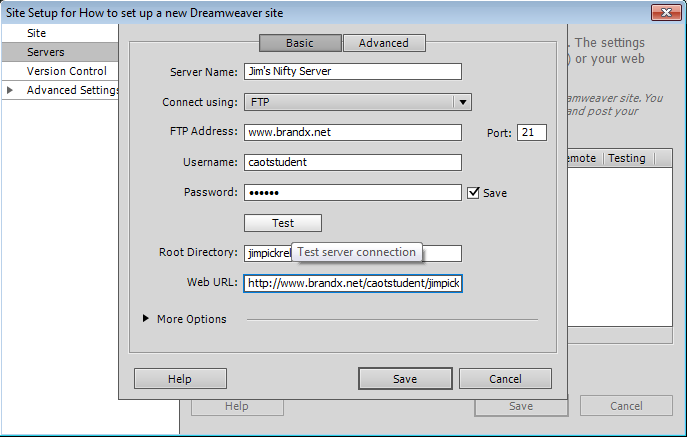
The server name is not important, just put something that will remind you what server this is.
The ftp address is usually the web address of the server you are suing. Do not include "http://" or path or filename, only include the server addres.
The username and password came with your account. If you are in a class at LACC then your instructor probably gave them to you. If you have a website on Brand X then the person who set up the site should be able to tell you the right username and password.
The "root directory" is the folder where your files are stored. If you are in a class at LACC then your instructor probably told you to use your name for the folder. Do not put any spaces in the folder name. If you are in the class at LACC then most likely we used putty to connect in and set up this folder. If you don't know how to set up a folder you may need to get help. You can't use a folder unless it has been set up first so make sure you have the name right.
Once you have set up your configuration, test it by clicking the "test" button. Make sure it works.
If it doesn't work, the problem is usually the servername, username or password.
We assume that you have completed the configuration as listed above. You also have built some pages. Now we want to upload the pages. It's very easy because Dreamweaver pretty much automates the process.
Find the file list which is usually in the lower right, and select the entire site by clicking on the first line, the one that starts with "Site..."
Click the up arrow (see picture) to upload the entire site.
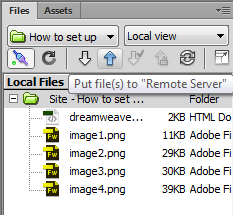
Dreamweaver will ask you if you are sure you want to upload the whole site. Click "OK".
Dreamweaver will then upload the files one at a time using ftp. If there is a problem, it will tell you.
If everything works, your site should be uploaded. Get out your web browser and see if you can see the files.